Download the software from the links provided in the email we sent you with your user credentials
To install, the application has to be Run as Administrator:
After downloading, right-click on the file and select ‘Run as Administrator’
Agree to any questions that pop up. Click ‘next’ where prompted.
Note: The installation of the TAP adapter can sometimes take up to a minute. Do not exit the installer while the TAP adapter is being processed.
Now that setup is complete you also need to set the program for Vista Compatibility mode and as Administrator:
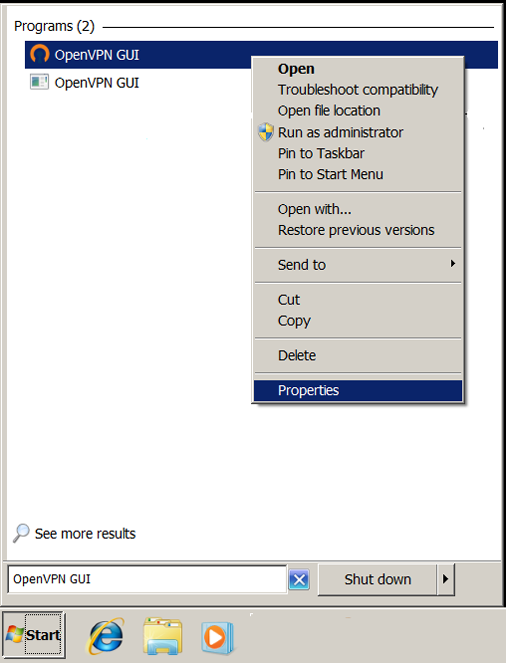
1) Find the file ‘openvpn-gui.exe’ that was just installed then right-click and select ‘properties’
You can find this file by entering OpenVPN-GUI in the search box in the Start Menu
Right-click on the file and select ‘Properties’
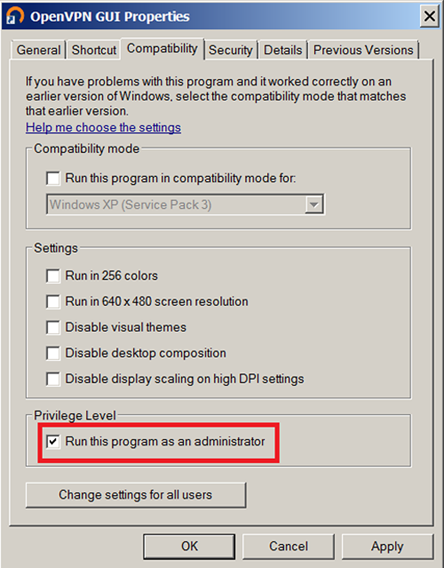
2) Click on the Compatibility tab
Check the box next to ‘Run this program as administrator’ and click on ‘Apply’ and then ‘OK’ to exit
The steps above do not need to be repeated after the initial setup.
You are now ready to launch the GUI into the system tray so you can log in
Launch the GUI by double-clicking on the desktop OpenVPN-GUI icon or from the Start Menu
This will place the application in the system tray
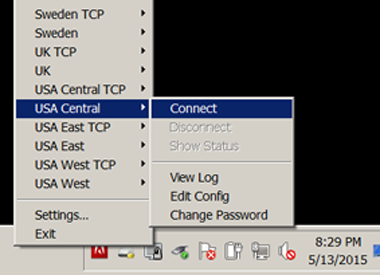
Go to the system tray, right-click and pick your connection then select ‘Connect’
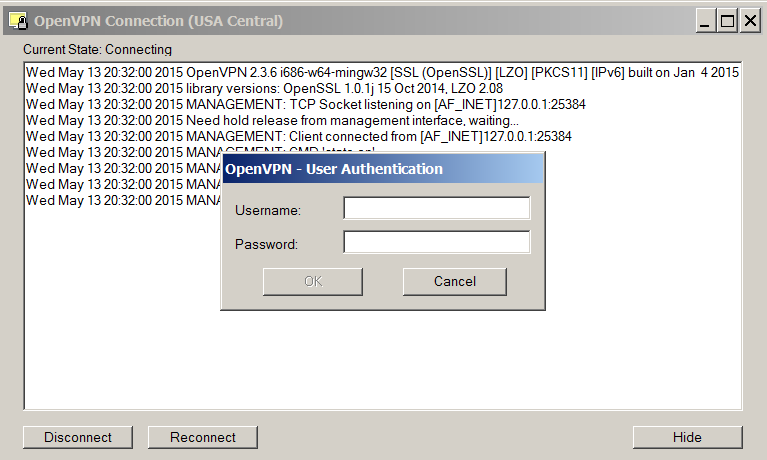
A window will pop up (note: the image above is only a representation. Your actual pick list will be longer) — enter your user name and password and the VPN will connect
You know you are connected when the gray icon turns green

(NOTE: The Assigned IP shown in the box above is not the address of the VPN server or the address that websites will see you as coming from. It is the internal address between your computer and the server.)
You can log in and out using the system tray icon as many times as you wish. If you reboot the computer or exit the application from the system tray re-launch the icon using the OpenVPN-GUI icon.
To set up Windows to auto start OpenVPN and log you into a default connection, please see this page.


