In some cases the DNS cache can become corrupted or poisoned. This could occur accidently or by accessing DNS servers in some countries which intentionally provide the wrong DNS data.
Oftentimes, this can be resolved by flushing the cache after connecting to the VPN.
Do the following flush steps before connecting to the VPN and then do it again, right after connecting.
For Windows:
(You must be administrator to perform this task)
1. Click on ‘Start’
2. Click ‘All Programs’
3. Click ‘Accessories’
4. Right click on ‘Command Prompt’ (double click in XP)
5. Select ‘Run As Administrator’ (All Windows except XP)

6. In the command window type
ipconfig /flushdns
press enter
7. You will see the following:
Windows IP Configuration
Successfully flushed the DNS Resolver Cache.
If you do not see this result please try again, making sure to Run as Administrator in Vista.
For Mac:
1) Click on Applications
2) Click on Utilities
3) Click on Terminal
4)
Leopard Type:
dscacheutil -flushcache
Tiger Type:
lookupd -flushcache
press enter
Now try connecting to your web site again and see if the problem is resolved.
For users of the Firefox browser you can also set it to always look for a fresh DNS entry and not use the cache.
1) Open Firefox
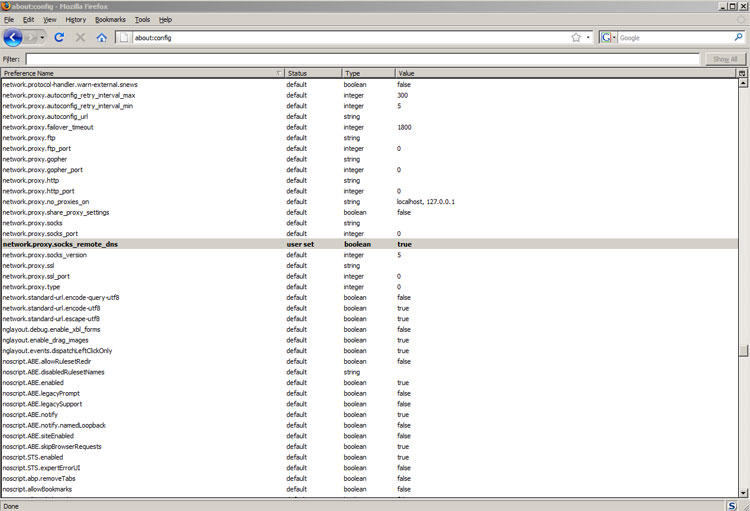
2) Type about:config in the URL bar and hit enter
3) Click on the I’ll be careful, I promise! warning.
4) Scroll down the list until you find network.proxy.socks_remote_dns.
5) If it set to false double click on the line to set it to true. (see image below)
6) Exit the browser and restart.
