Connect to your device via a web page. Use the address 192.168.199.1 in your browser window . The address could change, so check the documents you received from Sabai if this default address doesn’t connect. You will also find the router’s user id and password in the documents Sabai supplied with your router.
Follow those steps to setup the device, and allow access to the web pages:
Below is the Sabai web page shown when you first log in
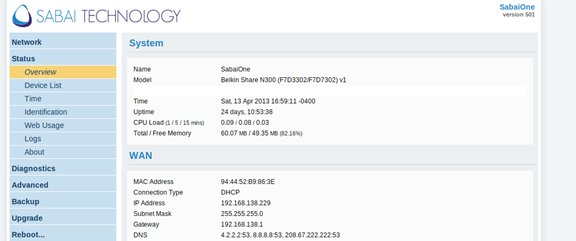
Click on the ‘Network’ option at the top left
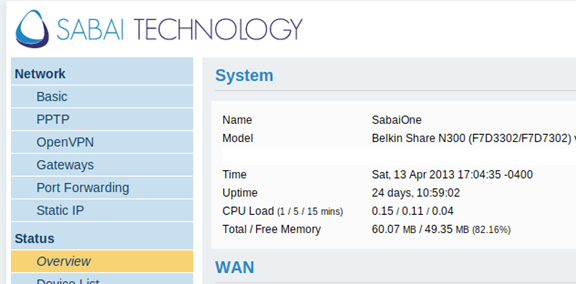
Choose ‘OpenVPN’ and the screen below will be displayed
Download the SurfBouncer configuration file from the link we sent you. (If you don’t have the link, email us and we will provide the information. You will need this file to configure the device)
Save the file to a location on your computer. Now click on ‘Choose File’ and select the file you downloaded

You will see this:
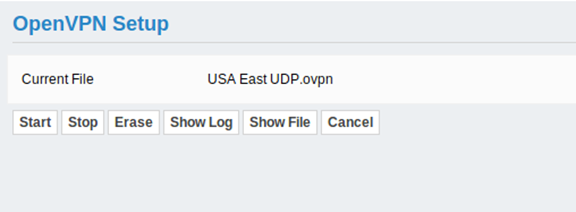
Now choose ‘Show File’

Click ‘ Edit’

You will now see a screen that allows you to enter your user id and password for your Surfbouncer account. (You receive that in the sign up email from Surfbouncer). Enter your user name and password at this screen:
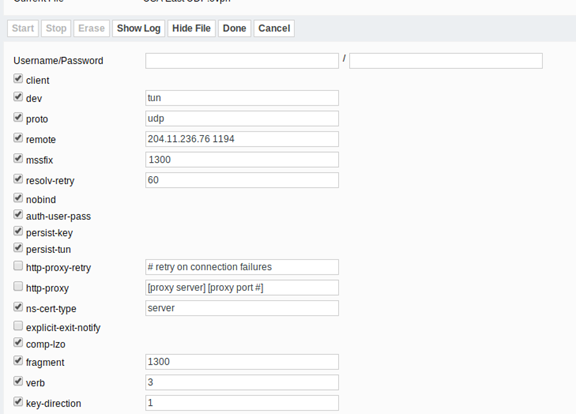
Click ‘Done’

Click ‘Save’
You are now ready to connect to Surfbouncer by clicking the ‘Start’ button

On the upper right of the screen, you will see that you’ve connected to our servers. In this example, it’s in Miami, Florida, USA.

To connect to servers in other parts of the world, use the list of servers we provided and follow the following steps:
Choose ‘Show File’

Then ‘Edit’

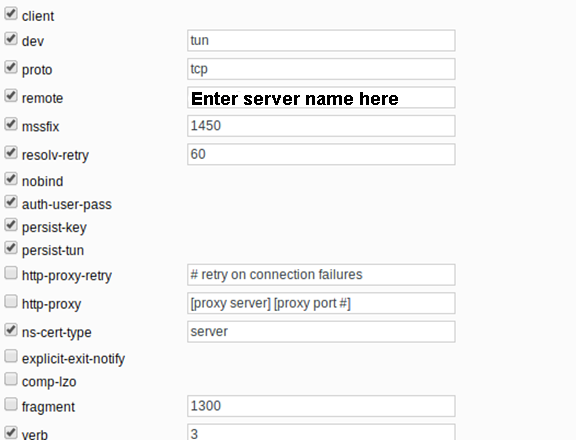
Change the remote field to one of the server locations in the list mentioned above
The format is as follows:
server.name 1194 – (to use default port 1194)
server.name 80 – (to use port 80)
server.name 443 – (to use port 443)
server.name 8080 – (to use port 8080)
server.name 5632 – (to use port 5632)
Where server.name is the name of the server from the list.
(NOTE: Some networks block some ports. Ports 80 and 443 are rarely blocked and are the best choices to start with)


To switch to TCP operation on networks where the default UDP is blocked, or the network connection is of poor quality, change proto from ‘udp’ to ‘tcp’
Use:
server.name 80 – (to use port 80)
server.name 8080 – (to use port 8080)
Uncheck ‘comp-lzo’
Uncheck ‘fragment’
It should look like this:
Click ‘Done’

Click ‘Save’

Then ‘Stop’
Then ‘Start’ to log in to the new server

Should you have any problems, please email us a copy of the connection log
To view the Connection Log, click ‘Show Log’
Copy and paste the log then attach it to an email